· AmendLogic · Documentation · 6 min read
Getting Started – Setting Up AmendLogic in TradingView
From unlocking the invite-only script to your first active webhook alert — this guide walks you through the complete setup. You'll learn how to choose your symbol and timeframe, adjust the strategy parameters to fit your setup, and configure alerts so signals are automatically forwarded to your exchange.

AmendLogic – Getting Started
Contents
- 1. Unlock the Invite-Only Script
- 2. Select Symbol and Timeframe
- 3. Configure Strategy Settings
- 4. Set Up an Alert in TradingView
- 5. Frequently Asked Questions
Prerequisites
- Active AmendLogic subscription (via Whop)
- TradingView account with Essential plan or higher
- Exchange account with webhook support (e.g. Bitget)
1. Unlock the Invite-Only Script
Once your subscription is activated, your TradingView account will automatically be granted access to the AmendLogic script. TradingView will notify you by email as soon as access has been granted.
To find the script:
- Open TradingView and navigate to any chart.
- Click the Indicators icon in the top toolbar.
- Switch to the Invite-Only Scripts tab.
- Search for AmendLogic and click the entry to load it onto the chart.
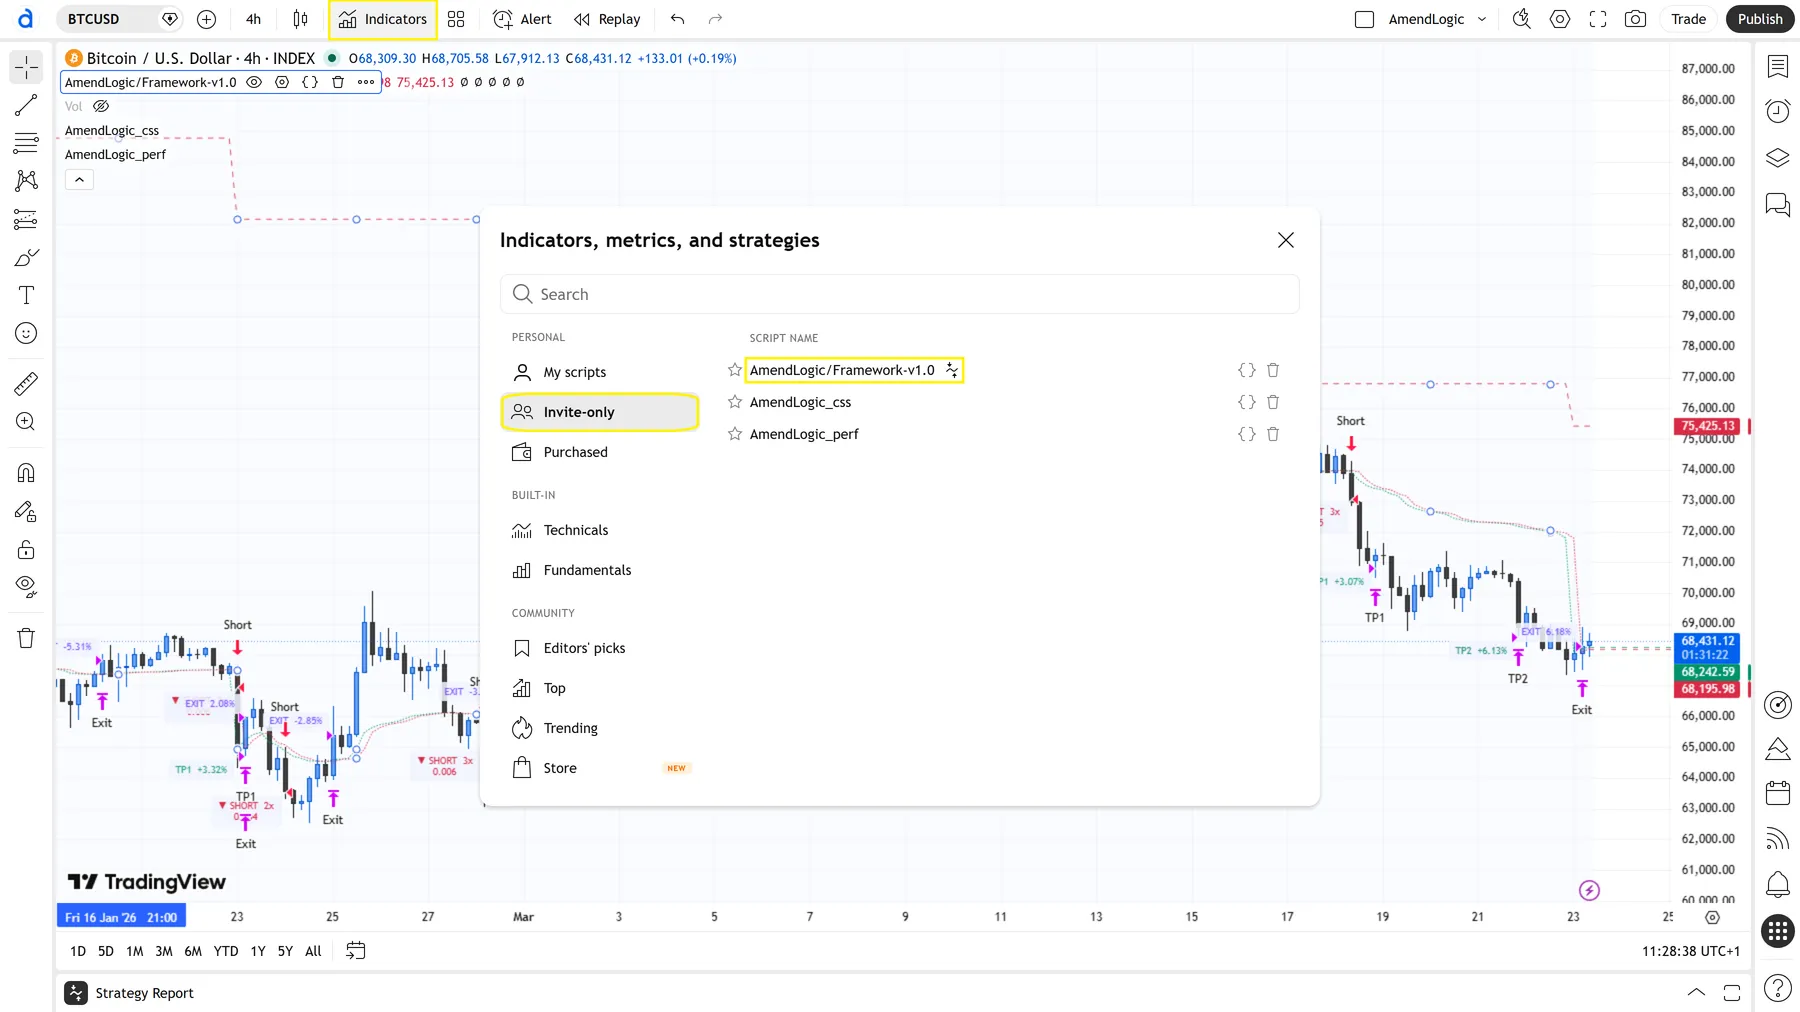
Figure 1 – Invite-Only Scripts in the indicators menu
If the script doesn’t appear, access may not have been granted yet. Wait a few minutes and reload the page.
2. Select Symbol and Timeframe
AmendLogic is optimized for Bitcoin (BTCUSDT / BTCUSDT.P) on perpetual futures markets. For other assets, the Bot Settings can be adjusted accordingly.
Recommended setup:
| Parameter | Recommendation |
|---|---|
| Symbol | INDEX:BTCUSD |
| Timeframe | 8h |
| Chart type | Candles |
- Enter the symbol in the search bar at the top left.
- Select the desired timeframe from the toolbar.
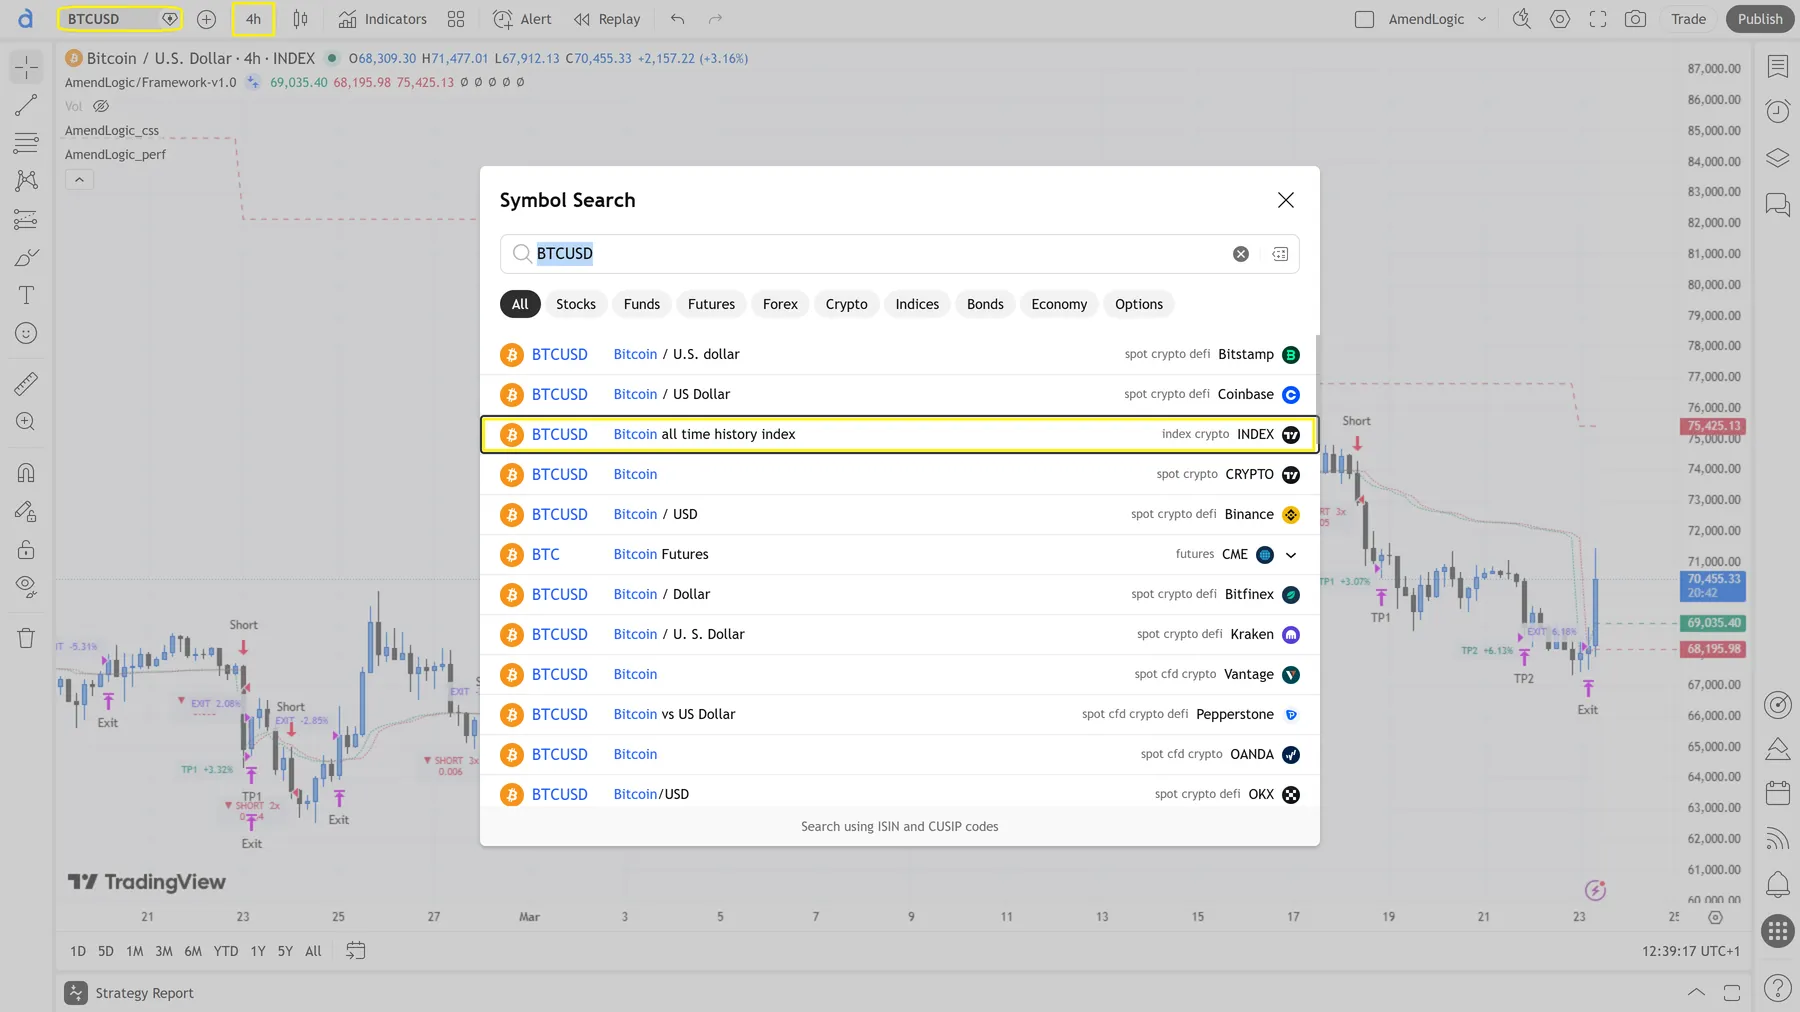
Figure 2 – Symbol and timeframe selection in TradingView
3. Configure Strategy Settings
Click the gear icon next to the strategy name in the chart to open the settings.
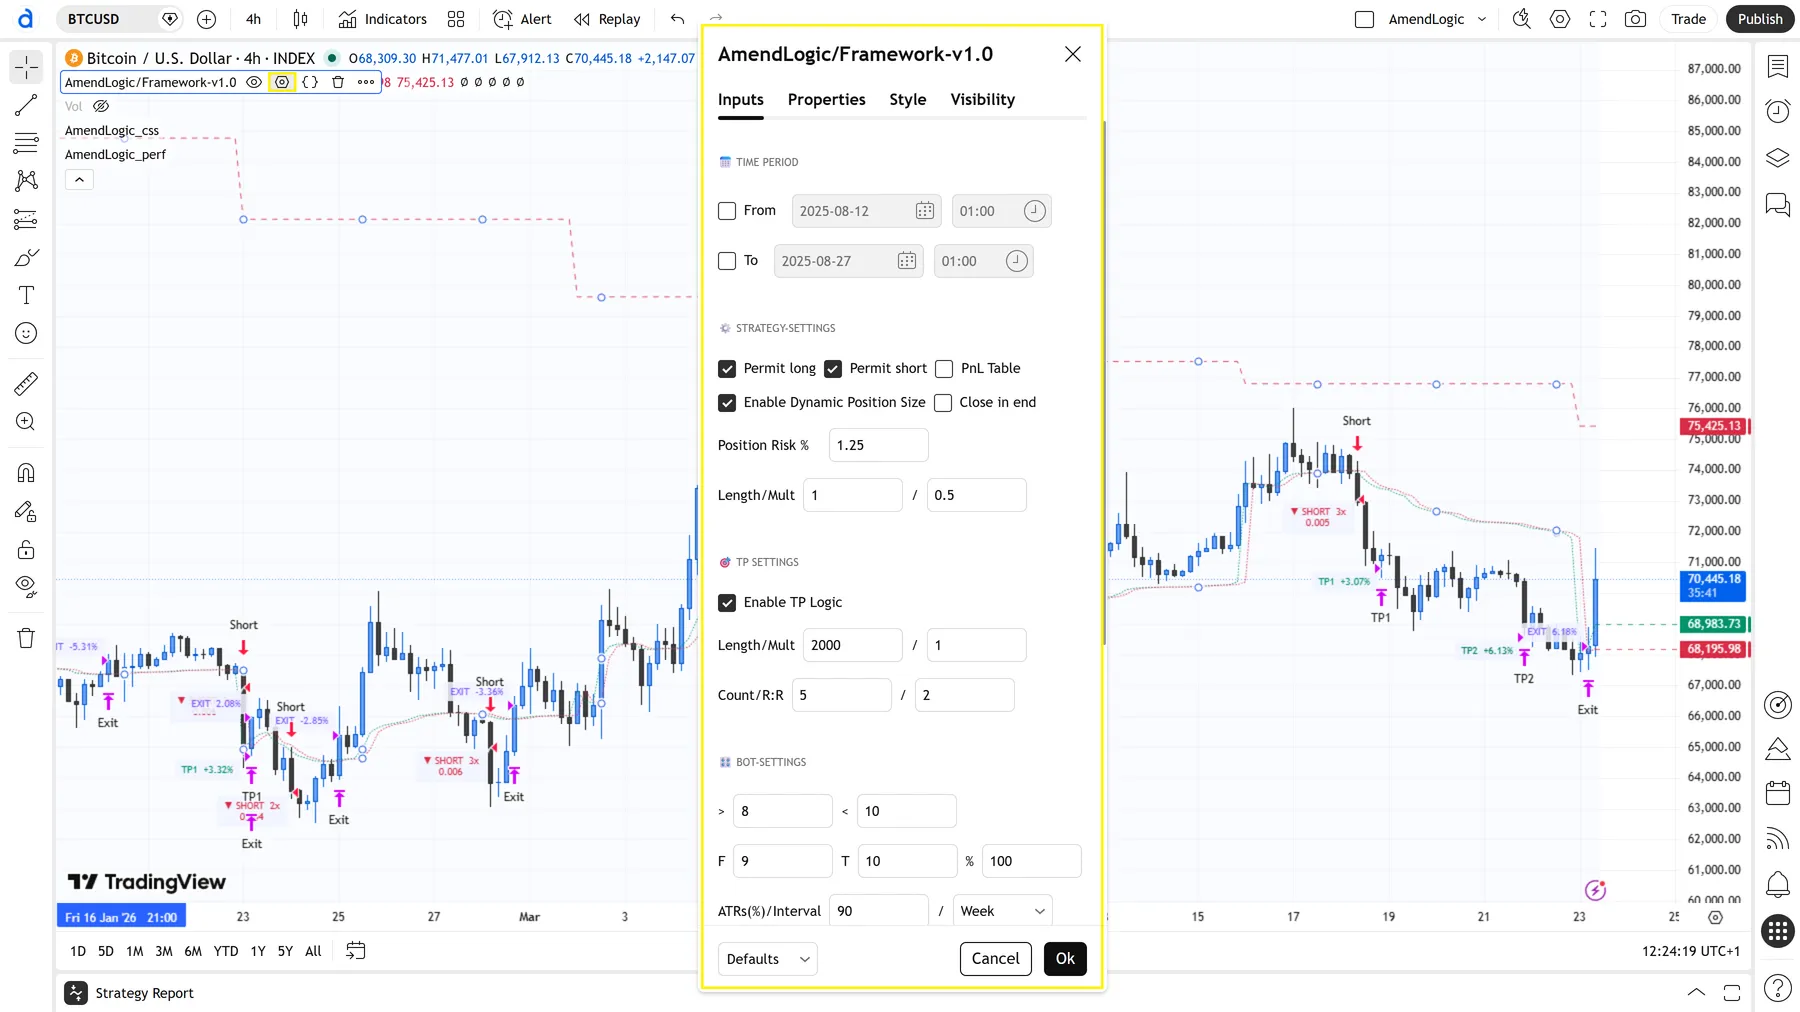
Figure 3 – Opening settings via the gear icon
3.1 Time Period
Defines the active trading window. Signals outside this range are ignored.
- Start Time / End Time – Enter times in UTC
- Useful for excluding news events or periods of low liquidity
Tip: Set the start date to the beginning of your intended trading period. TradingView calculates the starting capital — and therefore position sizes — from this date. An incorrect start date can cause orders that are too large or too small to be sent to your exchange in automated trading.

Figure 4 – Time Period configuration
3.2 Strategy Settings
Controls trading direction and position size.
| Setting | Description |
|---|---|
| Direction | Long Only, Short Only, or Both |
| Position Risk | Scales the capital amount per trade. Higher values = higher returns and higher drawdown |
Recommended for getting started: Risk Factor between 0.5 and 1.25 until you are familiar with the strategy’s behavior.
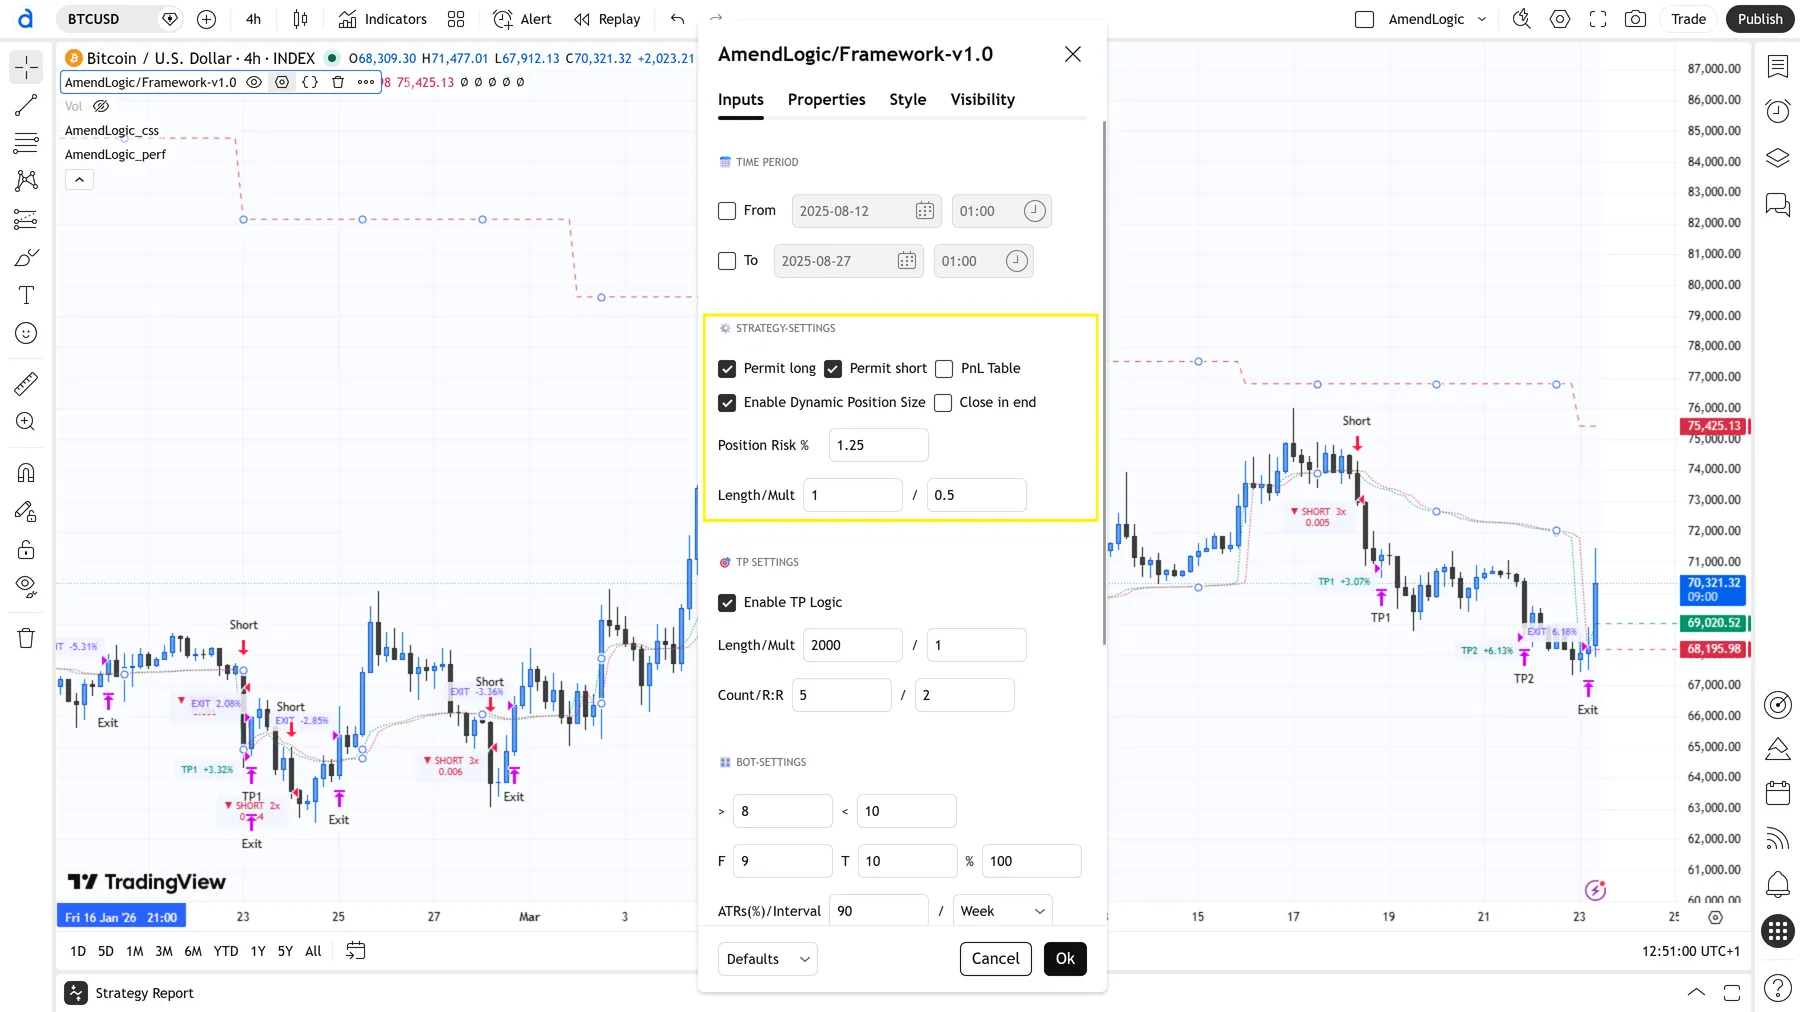
Figure 5 – Strategy Settings
3.3 Bot Settings
Fine-tuning for specific timeframes and assets. These parameters adapt the strategy’s behavior to the market structure and volatility of the chosen asset — without changing the core logic.
Only adjust these values if you are working with a different asset or timeframe than the default setup.
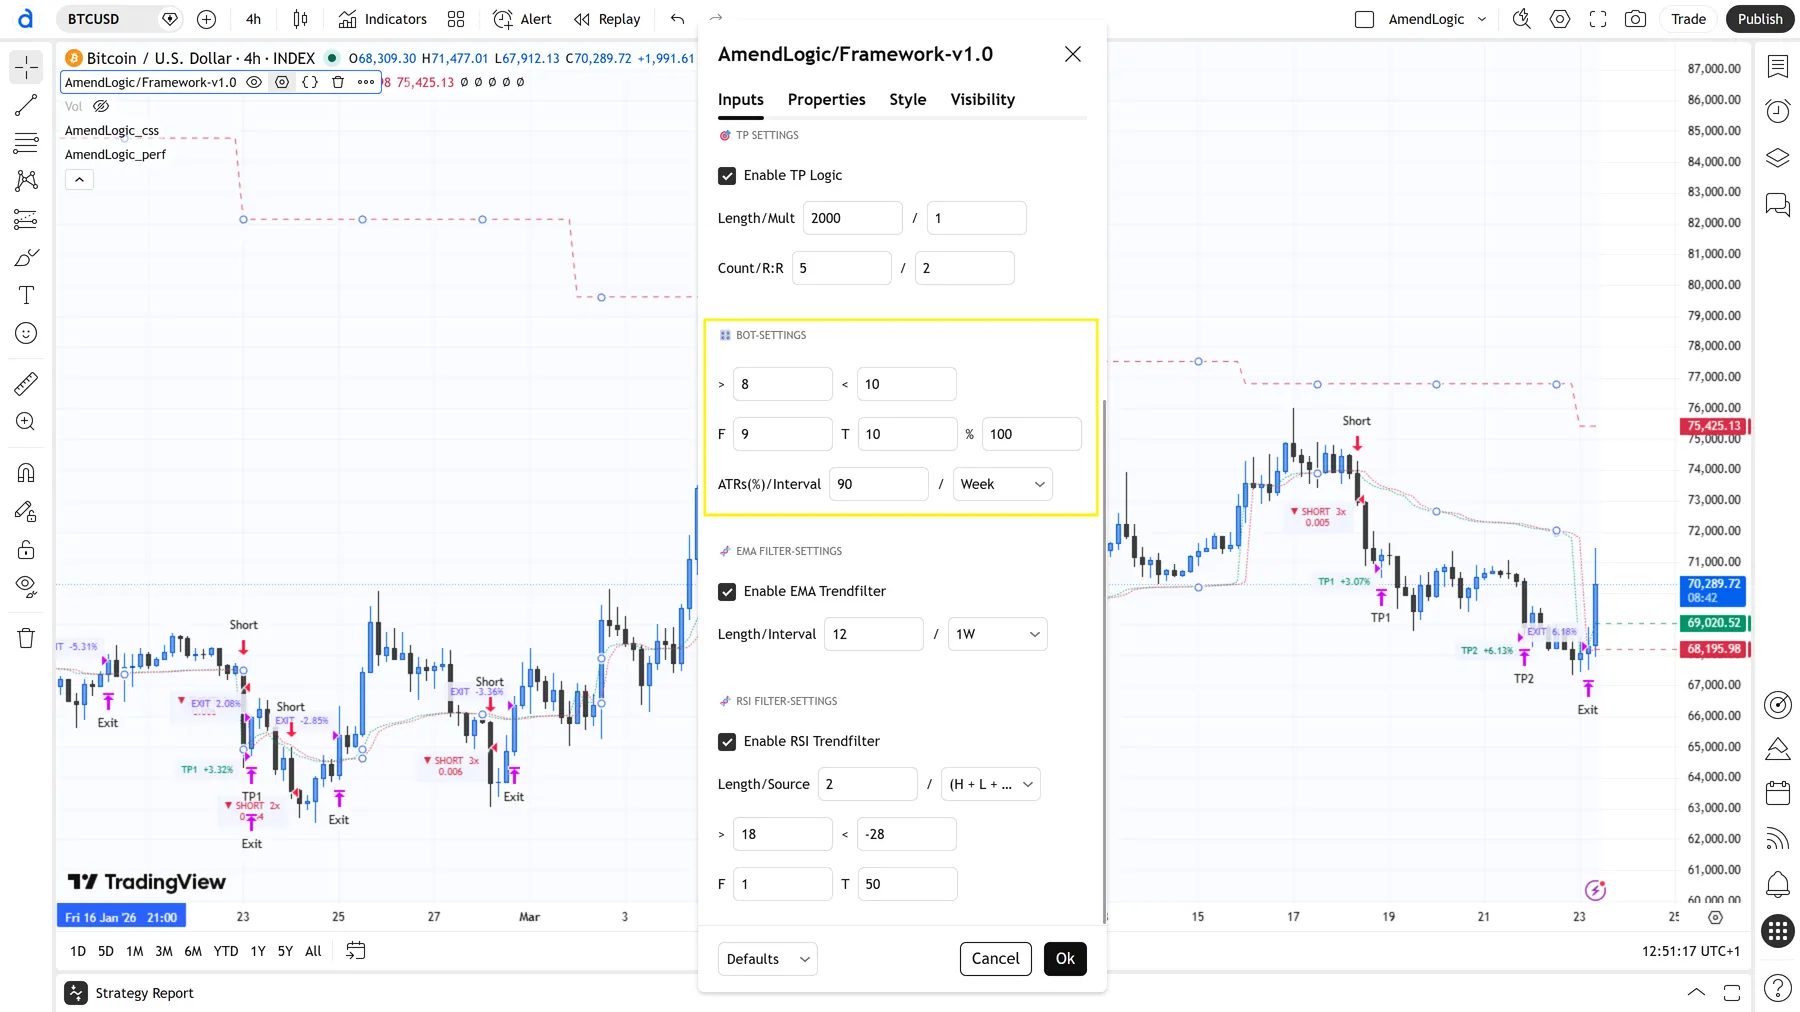
Figure 6 – Bot Settings
3.4 EMA Filter Settings
Incoming signals are filtered against a moving average (EMA). Trades against the higher-level trend are suppressed.
| Setting | Description |
|---|---|
| Length | Number of candles for the EMA calculation |
| Interval | EMA timeframe — independent of the chart timeframe (default: 1W) |
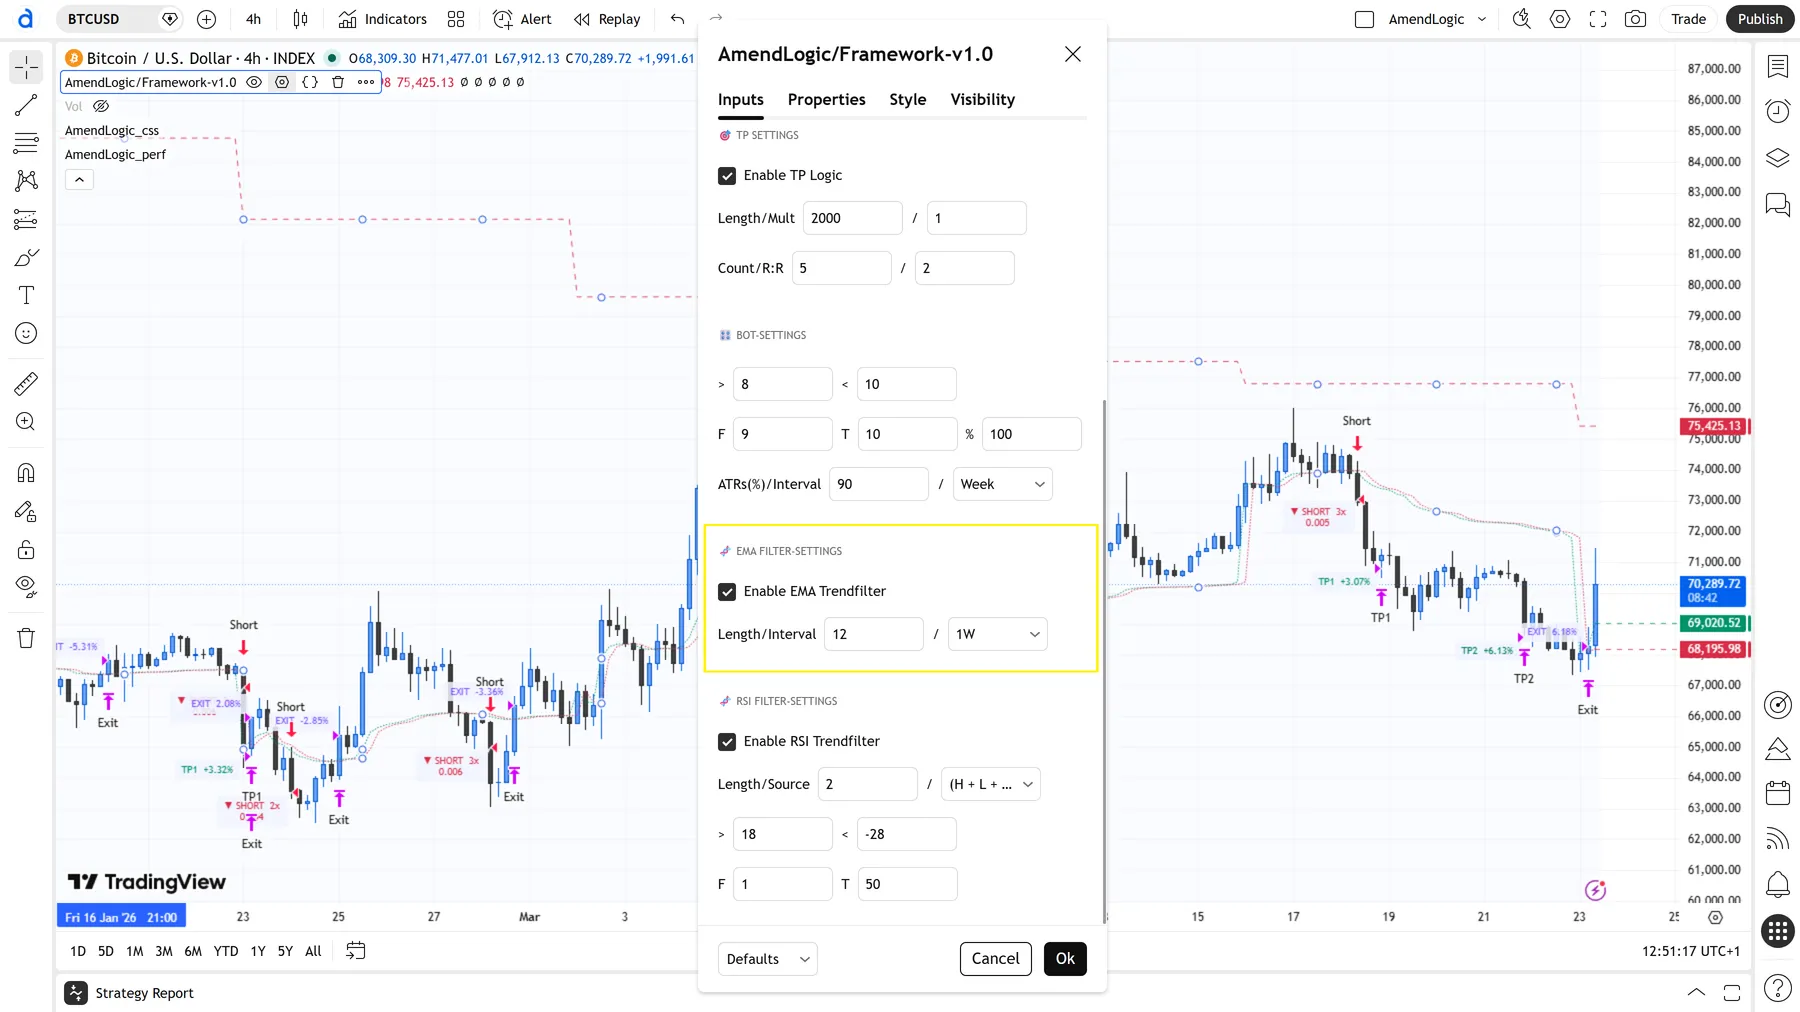
Figure 7 – EMA Filter
3.5 RSI Trend Filter
The RSI suppresses signals in overbought or oversold zones. The result is more selective entries with fewer false signals in trendless markets.
| Setting | Description |
|---|---|
| Length | Number of candles for the RSI calculation |
| Source | Price source (default: hlc3) |
| > | Long filter: RSI must exceed this value for a long signal to trigger |
| < | Short filter: RSI must fall below this value for a short signal to trigger |
| Mn | Lower boundary of the neutral RSI range |
| Mx | Upper boundary of the neutral RSI range |
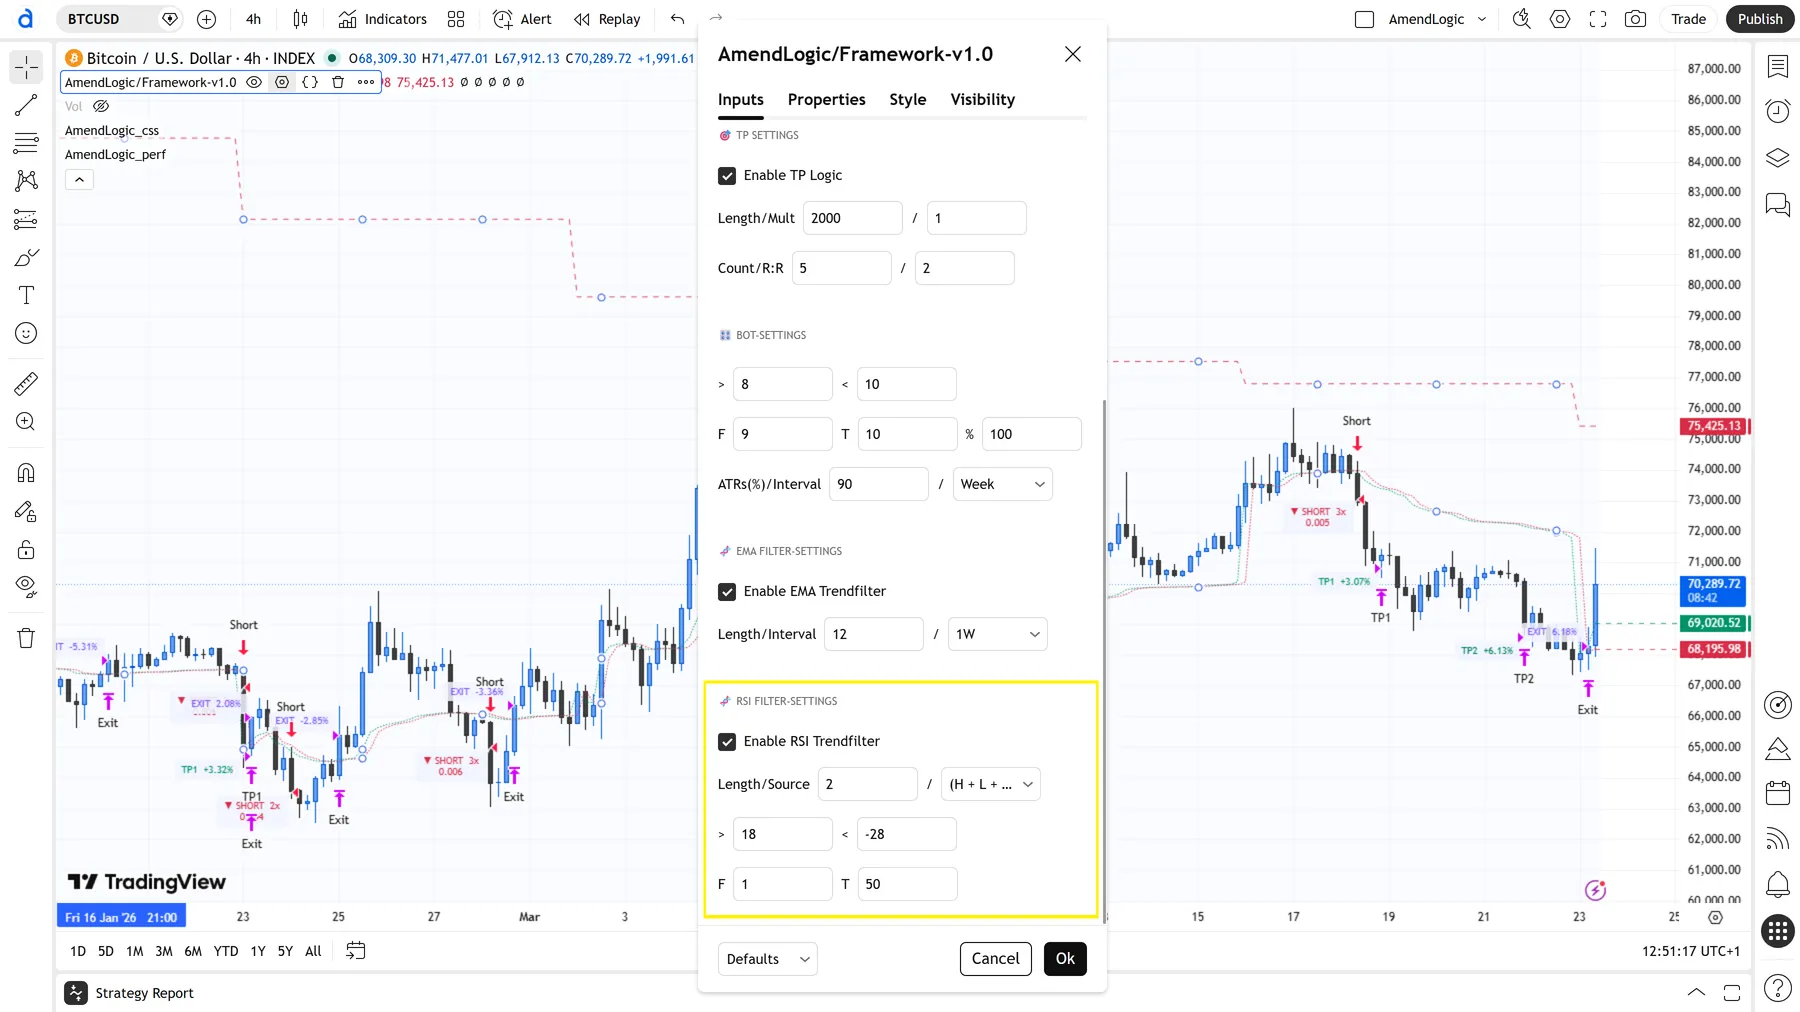
Figure 8 – RSI Trend Filter
3.6 Take Profit
Up to five scaled take-profit targets. Each target closes a defined portion of the position when a specific price level is reached.
| Setting | Description |
|---|---|
| Length | Calculation period (default: 2000) |
| Mult | Multiplier — scales the distance to the take-profit (default: 1) |
| Count | Number of active take-profit levels (1–5) |
| R:R | Risk-reward ratio |
The quantity is automatically split equally across all active take-profit levels — with Count 4, each level closes 25% of the position.
Backtesting note: TradingView’s engine models execution within a candle based on OHLC data, not tick data. Take-profits triggered within a single candle may show slightly better fills in the backtest than in live execution — a known limitation of the platform’s backtesting.
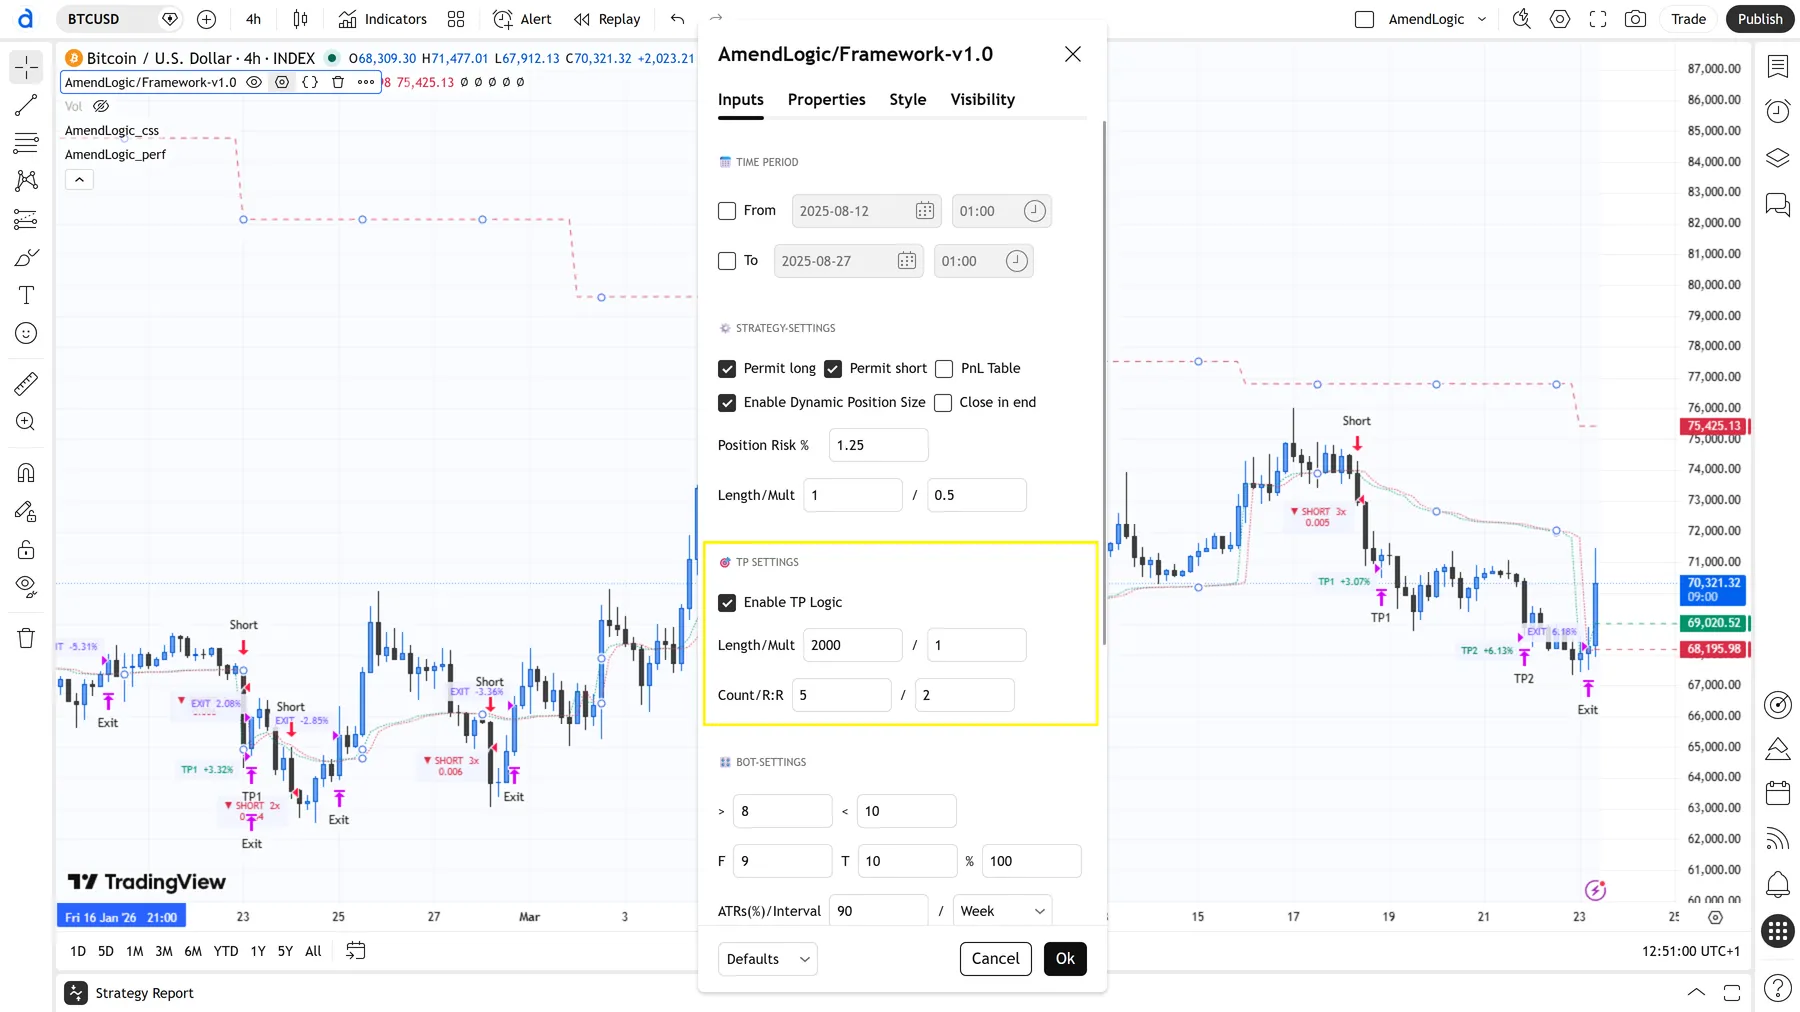
Figure 9 – Take Profit configuration
3.7 Performance Table
Displays the monthly PnL directly on the chart. Enable or disable the table as needed.

Figure 10 – Monthly performance table on the chart
4. Set Up an Alert in TradingView
Alerts enable automatic trade execution via a bot or exchange API. The TradingView Essential plan or higher is required for consistent execution — the free plan limits the number of active alerts.
4.1 Create an Alert
- Click the Alert icon (bell) in the toolbar or press
Alt + A. - Select the AmendLogic strategy as the condition.
- Make sure Order fills is selected as the trigger.
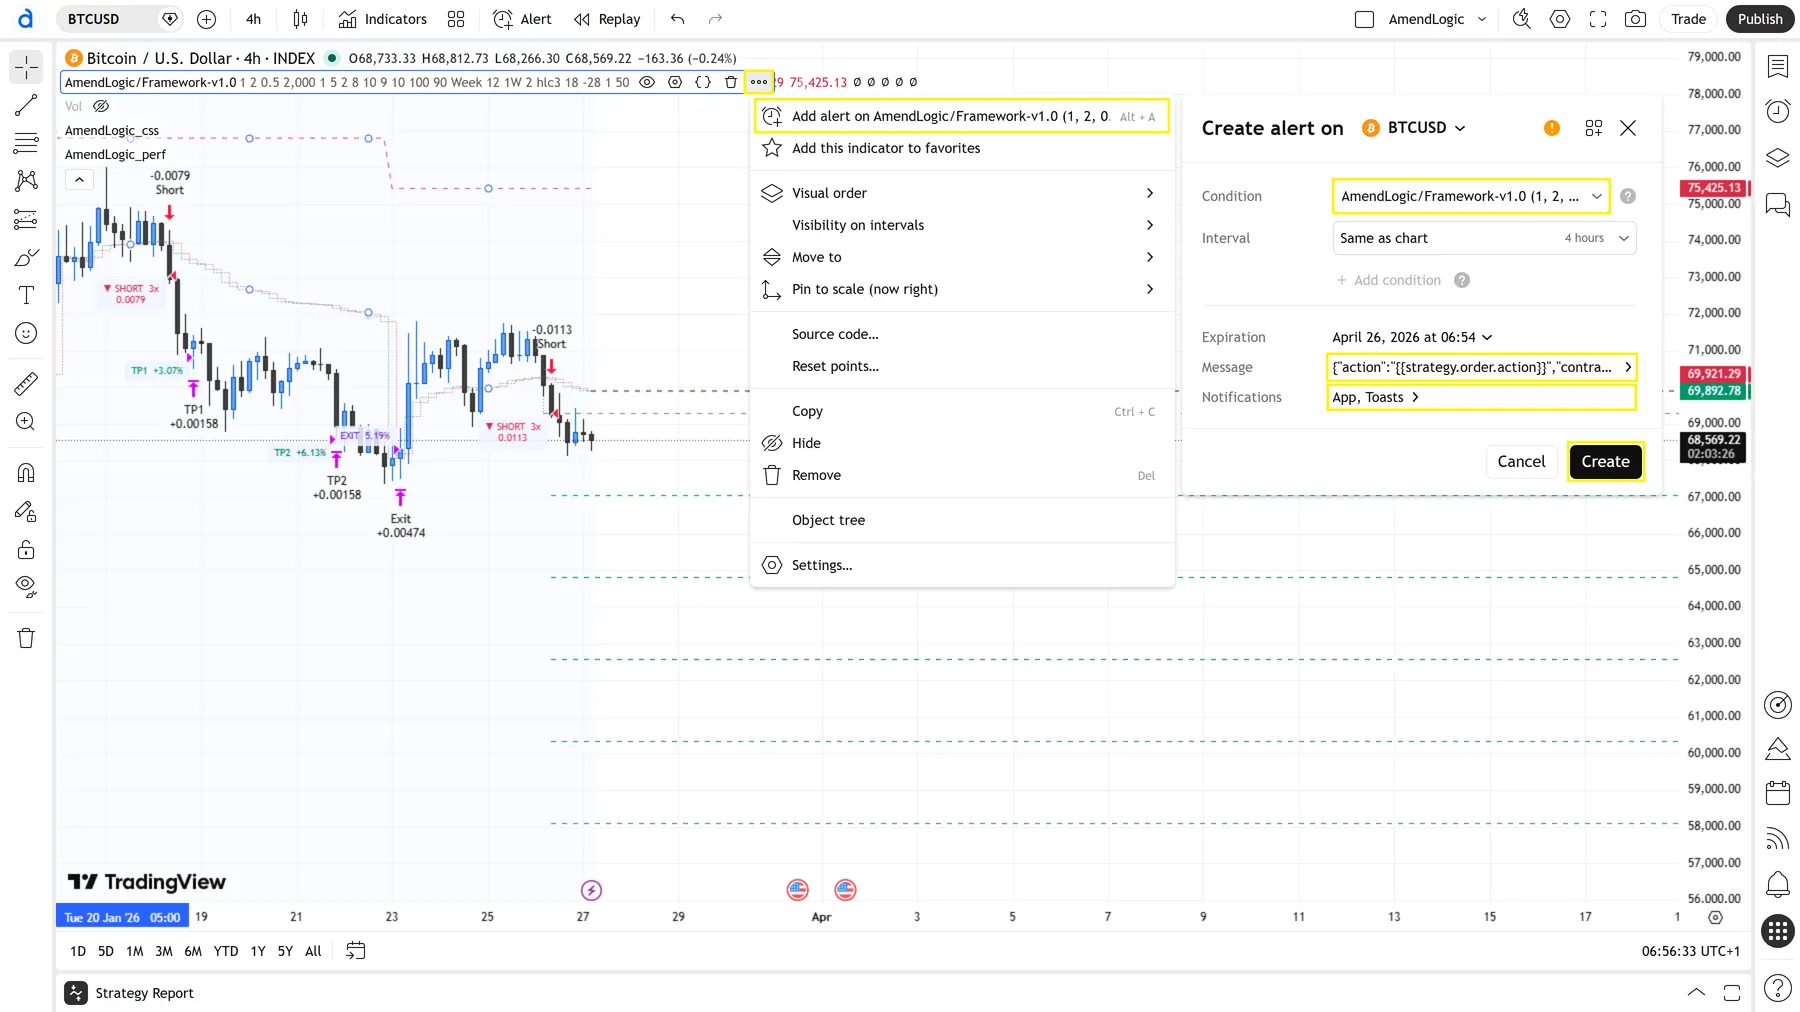
Figure 11 – Selecting the alert condition
4.2 Configure the Alert Message
The alert message contains the JSON payload sent to your bot. The exact format depends on your bot provider. A typical example:
{
  "action": "{{strategy.order.action}}",
  "contracts": "{{strategy.order.contracts}}",
  "marketPosition": "{{strategy.market_position}}",
  "positionSize": "{{strategy.position_size}}",
  "prevMarketPosition": "{{strategy.prev_market_position}}",
  "price": "{{close}}",
  "symbol": "{{ticker}}",
  "time": "{{timenow}}"
}
The correct payload format for your provider can be found in your bot provider’s documentation.
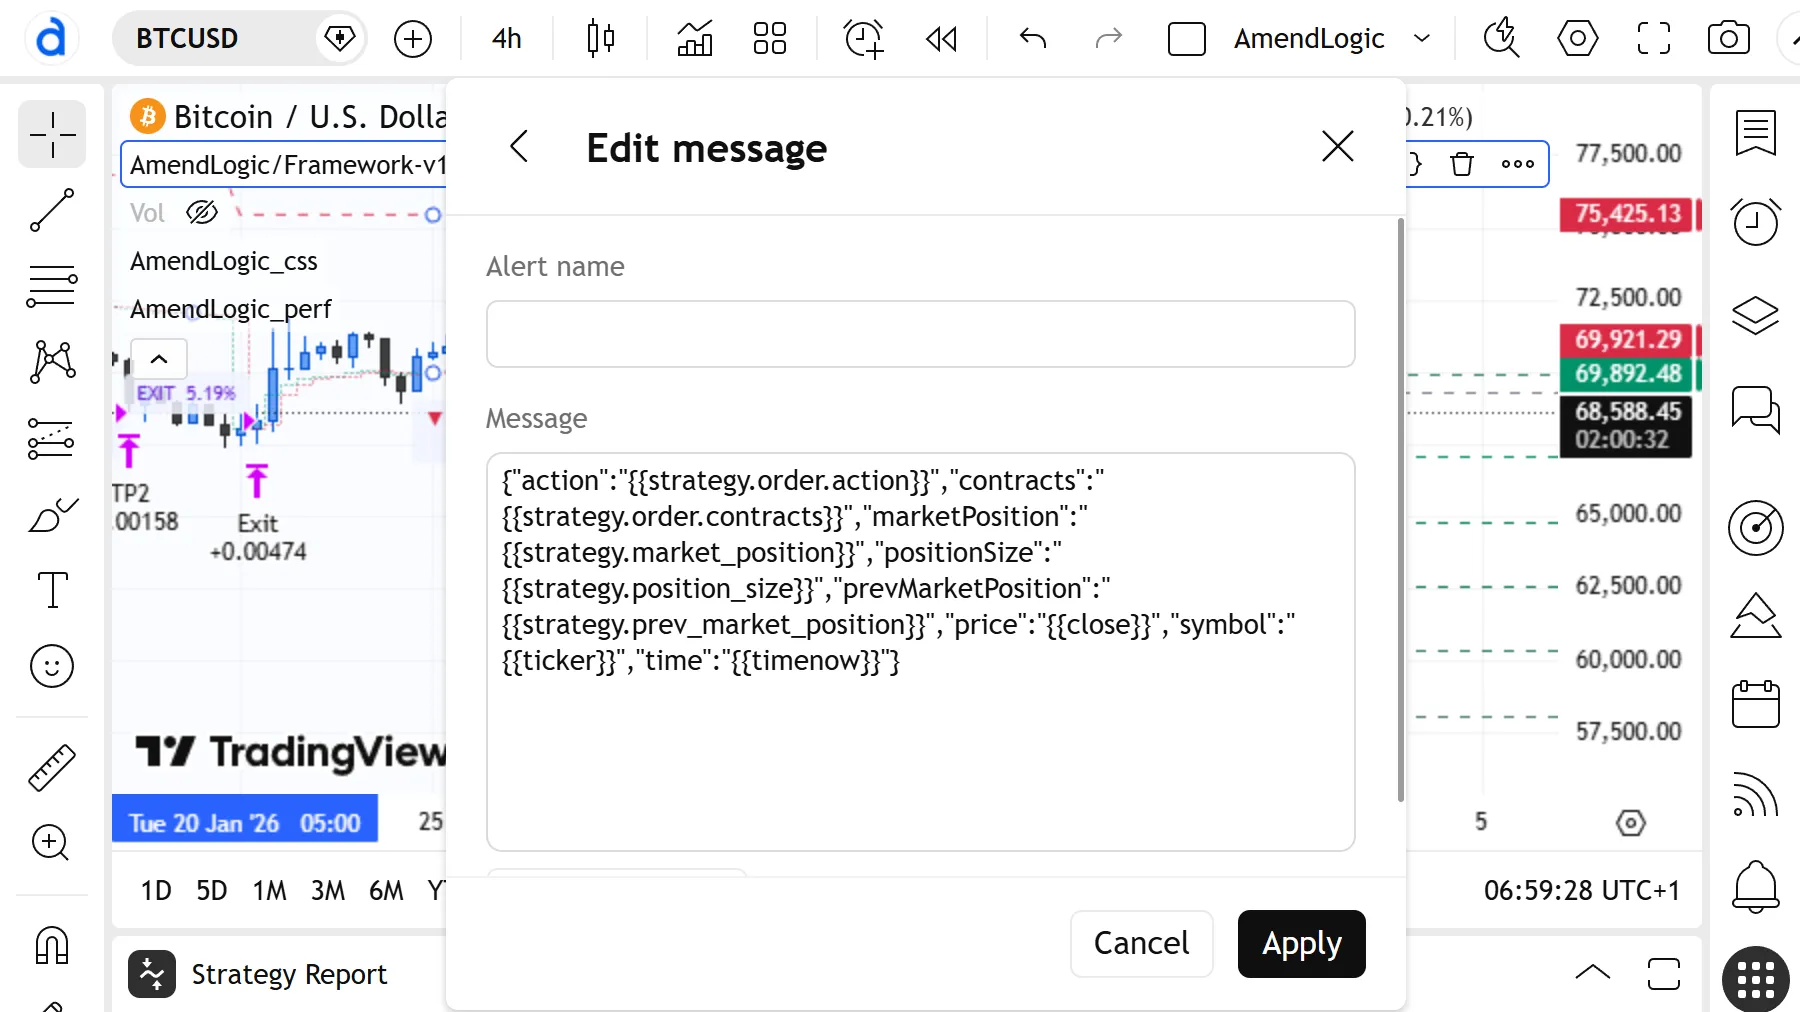
Figure 12 – Alert message with JSON payload
Tip: To make the payload independent of the selected chart symbol, replace
"{{ticker}}"with the fixed coin name used by your exchange:{ "symbol": "BTCUSDT" }On Bitget Perpetual Futures the format is typically
BTCUSDTorBTCUSDT_UMCBL.
4.3 Enter the Webhook URL
For TradingView to actually forward the alert message to your bot, the webhook URL of your provider must be entered in the alert dialog.
- Enable the Webhook URL checkbox in the alert dialog.
- Paste the webhook URL of your bot provider — on Bitget you’ll find this URL in the bot settings of your exchange.
- The URL typically follows this format:
https://<provider-domain>/webhook/<your-token>Note: The webhook URL contains your personal API token and should not be shared publicly. Anyone who knows this URL can trigger orders on behalf of your account.
Next step: Connect your TradingView alert to your exchange — either via a third-party webhook or self-hosted on Google Cloud Run Functions.
| Exchange | Third-party Webhook | Self-hosted Webhook |
|---|---|---|
| Bitget | Guide → Bitget | Guide → Google Cloud Run |
4.4 Activate the Alert
- Click Create — the alert is now active.
- Active alerts are visible in the Alerts panel (right sidebar).
- Test the alert by reviewing the strategy on historical data or by running a test trade with minimal capital.
Tip: Start with a small position size and verify that signals are being transmitted correctly before trading with real capital.
5. Frequently Asked Questions
The script doesn’t appear under Invite-Only Scripts. Access can take up to 10 minutes. Check that the TradingView account is linked to the account you provided on Whop.
Alerts are not triggering. Check whether your TradingView plan supports active alerts. The free plan is not sufficient for consistent execution. Note that the browser tab does not need to be open — alerts run server-side on TradingView.
Last updated: March 2026 · AmendLogic